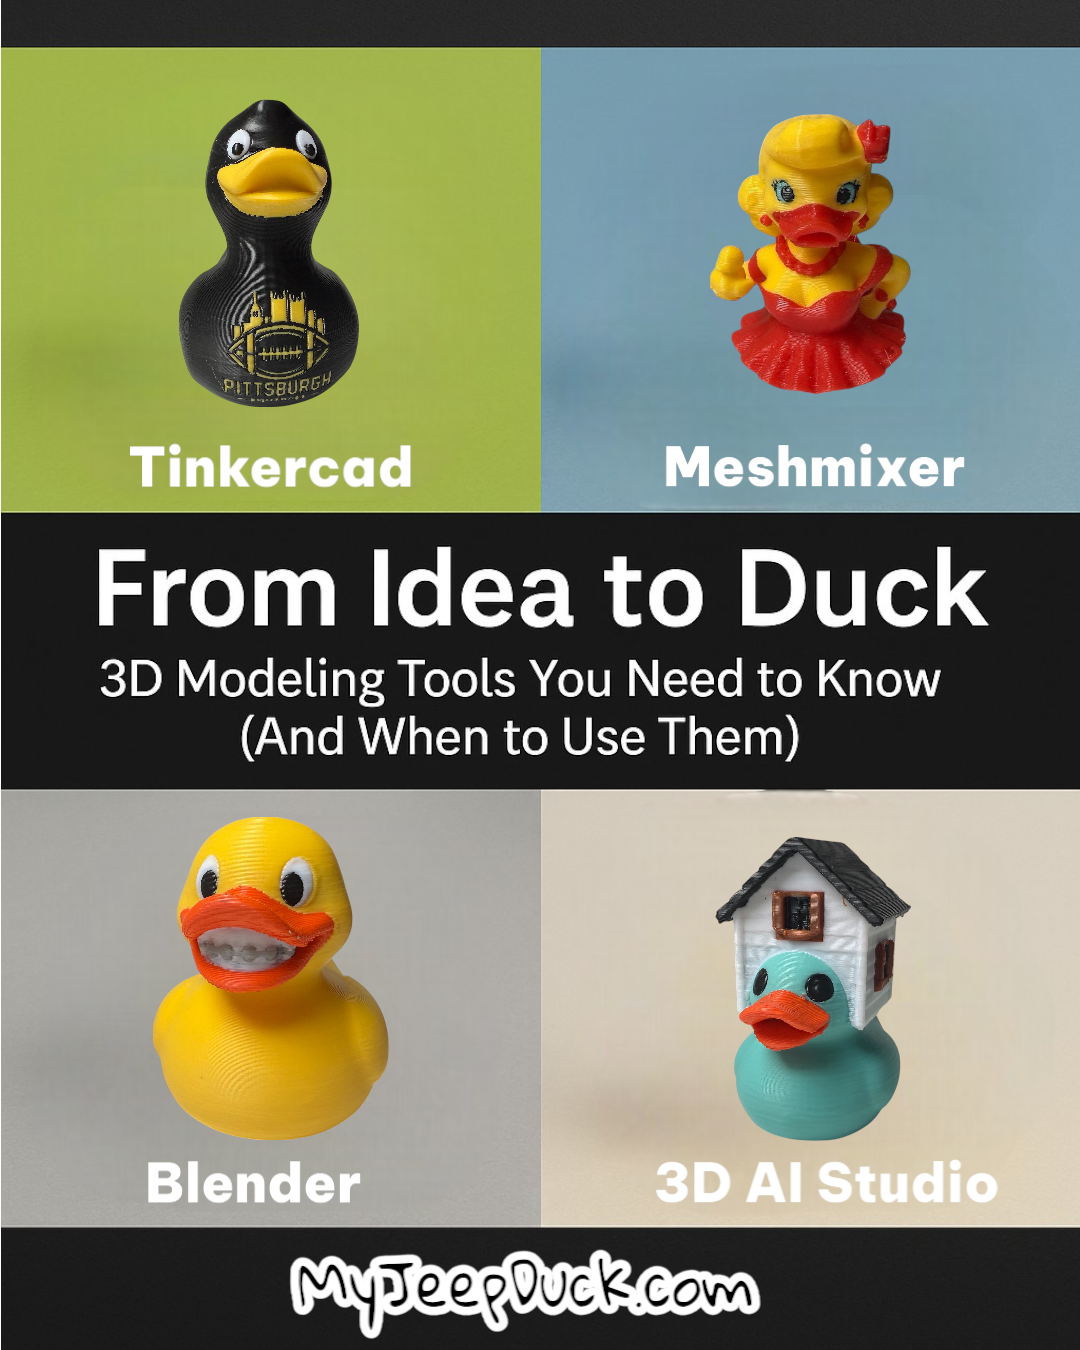
From Idea to Duck: 3D Modeling Tools You Need to Know (And When to Use Them)
Phil TullaiIf you've ever wondered how a duck goes from just an idea in my head to a physical, 3D-printed collectible, you're not alone. The truth is, I use a combination of tools to bring each duck to life, and every tool has its strengths. Whether you're a total beginner or someone looking to sharpen your 3D modeling game, here's a behind-the-scenes guide to the essential tools I use to design ducks—and how you can use them too.
🌟 Tinkercad: The Perfect Start for Beginners
Best for: Simple shapes, text additions, basic modifications
If you're brand new to 3D modeling, Tinkercad is the friendliest tool out there. It's browser-based, free, and easy to learn. I often use Tinkercad for:
- Adding nameplates or logos to ducks
- Combining basic shapes like hats, glasses, or signs
- Quick edits to existing STL files
Bonus: You can import SVG files for custom outlines (great for turning a school logo into a 3D piece).
Learn More: Official Tinkercad Learning Center
🤖 3D.AI Studio: AI-Assisted Creativity
Best for: Rapid concept generation, stylized characters, playful experiments
Sometimes I need to whip up a quick idea and 3D.AI Studio gives me that creative jumpstart. It uses generative AI to shape characters based on prompts. I’ll sketch something like "lifeguard duck with sunglasses" and it gives me a base I can refine further.
- Not perfect out of the box, but excellent for brainstorming
- Exports OBJ files easily, which you can edit later
- Great for non-technical creators looking for inspiration
- Blender is also a great companion tool for 3D.AI Studio — it helps convert AI-generated textures into usable vector paints
Learn More: 3D.AI Studio Quick Start Guide (official support site)
🛠️ Meshmixer: For Sculpting and Smoothing
Best for: Combining models, reshaping limbs or wings, organic curves
Meshmixer is my go-to when I need to clean up geometry, combine parts, or make a duck look more natural. It’s where the "rubber duck" shape really gets its character.
I use Meshmixer to:
- Merge heads, hats, arms, and accessories together
- Smooth rough OBJ files from AI tools
- Adjust supports and hollow models before exporting
- Set up paint zones using modifier meshes for later coloring in Bambu Studio
Learn More: Meshmixer YouTube Tutorials by Maker’s Muse
🖌️ Blender: Ultimate Customization
Best for: Advanced modeling, custom expressions, detailed remeshing
Blender is the power tool in the kit. It’s not beginner-friendly, but it gives you full control over every detail. I bring ducks into Blender when:
- I need to fine-tune facial expressions or poses
- The mesh needs repair or retopology
- I want multicolor printing with vertex painting
- I need to process or remap textures from 3D.AI Studio into printable formats
Pro Tip: Blender lets you assign color to faces for Bambu multicolor prints. This is essential if you're using an AMS unit.
Learn More: Blender Beginner Tutorial Series by Blender Guru
🎓 Other Helpful Tools
- SVGpro: Turns vector images into SVGs for nameplates or logos
- Canva: Great for sketching visual ideas or duck silhouettes
- Tinkercad + SVG combo: Turn hand-drawn school mascots into 3D keychains
-
Bambu Studio: While technically a slicer, it’s also amazing for:
- Previewing how multicolor ducks will look before print
- Resizing models to optimal scale
- Painting and assigning colors
- Attaching external STL logo files or modifiers
Learn More: Bambu Studio Quick Start Guide
🦆 Real Duck Examples
Here are a few of my ducks and the tools used to create them:
- Safari Duck: Sketch in 3D.AI Studio > refined in Meshmixer > printed with multicolor settings in Blender
- Coffee Duck: Cup made in Tinkercad > duckhead attached in Meshmixer
- Licensed College Ducks: School logos vectorized and added using SVGpro + Tinkercad combo
✨ Getting Started? Here's What I Recommend:
- Start with Tinkercad – Get used to the idea of 3D space and combining shapes
- Use 3D.AI Studio – Let the AI help you generate fun ideas
- Download Meshmixer – Practice combining objects and smoothing them out
- Learn Blender if you're ready – It’s powerful, and worth the learning curve
- Use Bambu Studio – Finalize your models, add color, and optimize for printing
📅 Coming Next Week: Print Like a Pro
In Part 2 of this series, I’ll share the exact Bambu settings I use to print dozens of ducks a week—while keeping filament costs down and quality up.
Until then, tag me if you try making your own duck. I’d love to see it.
- myjeepduck